Reef Tank
Best Protein Skimmer DIY
So you want to build your very own protein skimmer? Like me you’ve looked around at other DIY designs. I decided to design my own since the other DIY designs I had seen had some drawbacks that didn’t thrill me or took too much skill or equipment to build.
10 Best Protein Skimmers
If you don’t want to make your own protein skimmers, I have listed a 10 best protein skimmers below.


One thing that you have to have for a skimmer is visibility – especially if you are going to design your own. To determine whether your efforts have been successful, how are you otherwise going to determine whether your design is effective? What’s is going on inside? Is it too turbulent? How many bubbles are being generated. How small are they. How do you tune it, let alone see if what you built worked? It (or at least most of it) has to be made from transparent material. This was the flaw of most PVC skimmers as well as having a limited diameter of pipe and fittings(4″) that is readily available at the local hardware store.
Building a skimmer body out of Acrylic requires a some significant skills, Including having a set of tools: a table saw(typically), a router, clamps, sometimes make a few jigs, and lots of patience (not a bad attribute for a reefer) waiting through the sequence of bond cures for each stage of the construction process. I’ve worked with acrylic. I have the tools to do this, but I also realize that most people don’t. Acrylic is also expensive.
The resulting acrylic skimmer however can be a real performer and can rival commercial systems. Yet for me it still lacks a few convenience items. Quick access is usually not an option. Being able to easily swap out the body of a skimmer with a clean one. I like to make two bodies and not have a significant downtime for skimmer maintenance – just swap and kick it back on. Clean the other one when I’m ready (or can’t stand the smell anymore). Another minor issue is acrylic for all it’s strength compared to glass is still fragile enough to crack if dropped. Cost is another factor for acrylic. The acrylic tubing can quickly add cost to a DIY system. Acrylic has been proven as a good option for material, but I set out to try something different, hopefully it would be just and good (if not better) and cheaper (for an in sump model).
I believe that after using this skimmer for over a year now that the design works very nicely. I consistently get skimmate and I have it tuned very nicely. It is easy to clean and has proven to be very durable.
Distinct advantages for this protein skimmer:
- Low cost.
- Transparent: box, body, and collection cup.
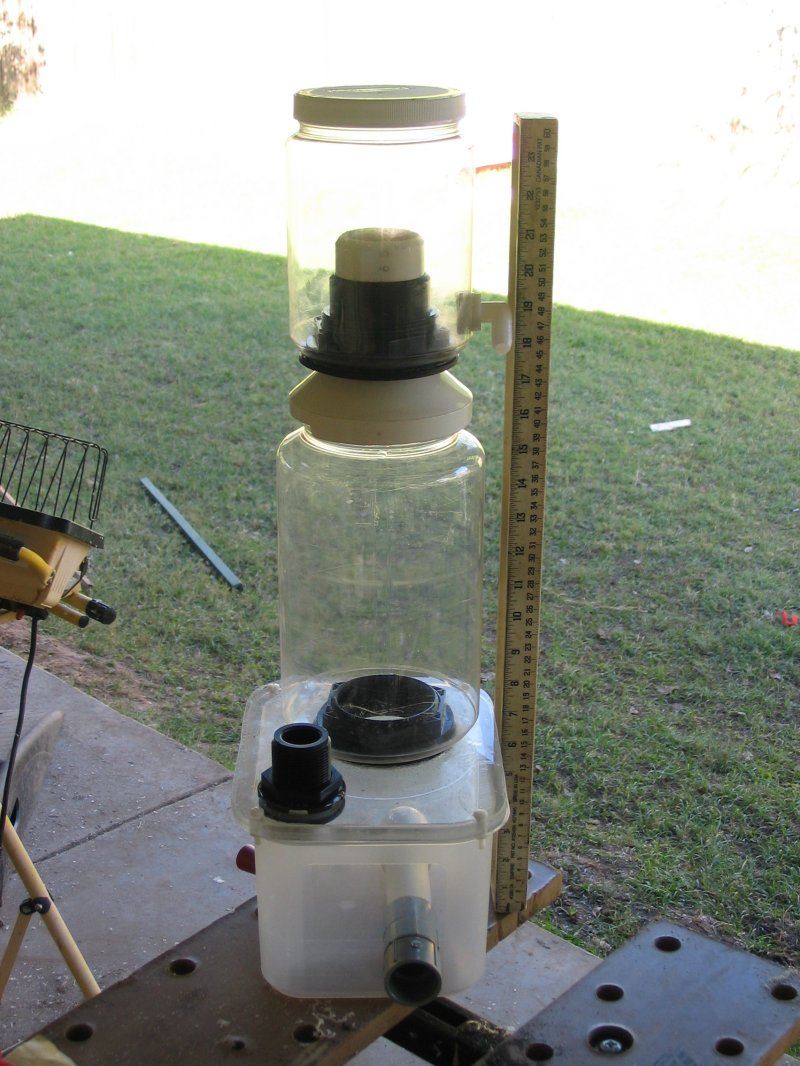
- 5.5″ wide body holds 1+ gallons.
- Durability. Made from the same material used in soda bottles (Polyethylene) only thicker. If you’ve ever dropped a soda bottle you’ll know that you’re not worried at all about your soda bottle splitting open? This material is extremely tough. It’s also and transparent.
- Quick access to the components that need mainenence. Screw on lids and screw on collection cup and riser.
- Minimal tools required. Minimal Skill required. See below.
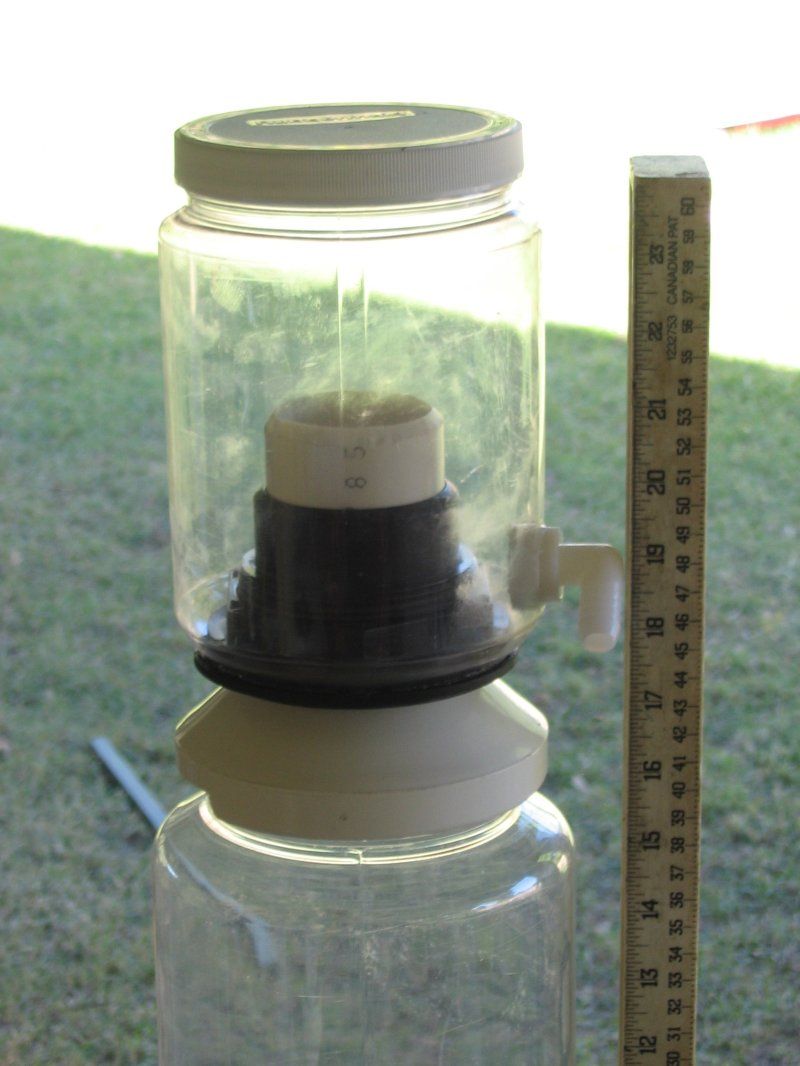
- 26″ tall with only 27″ clearance required for cup removal. (Fits under most standard cabinets)
Disadvantages:
- This design is for an in sump skimmer only.
Supplies you’ll need:
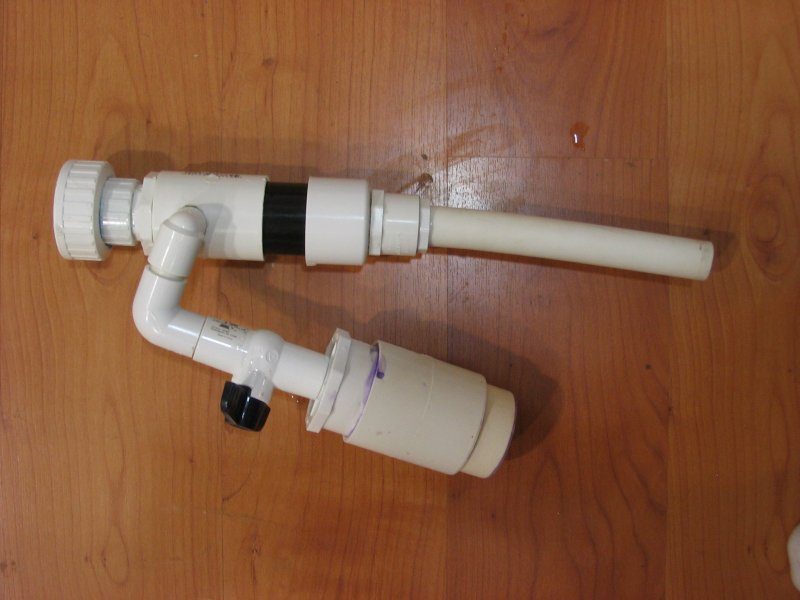
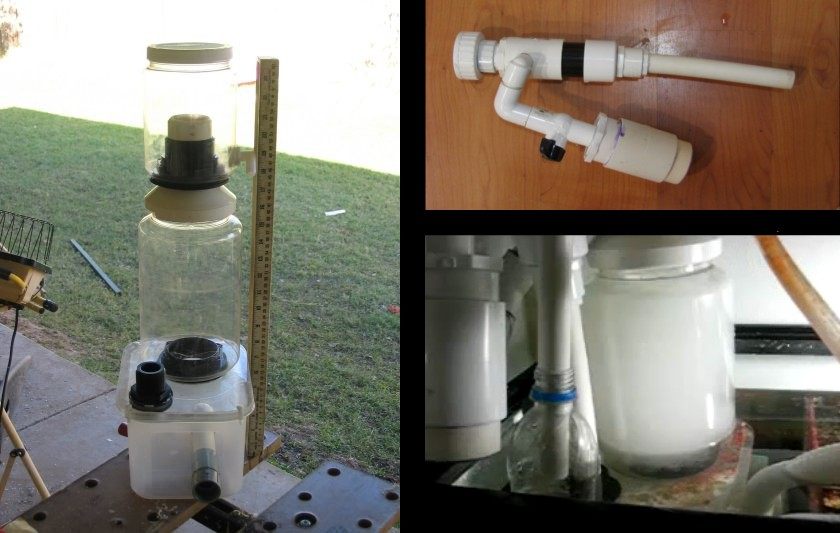
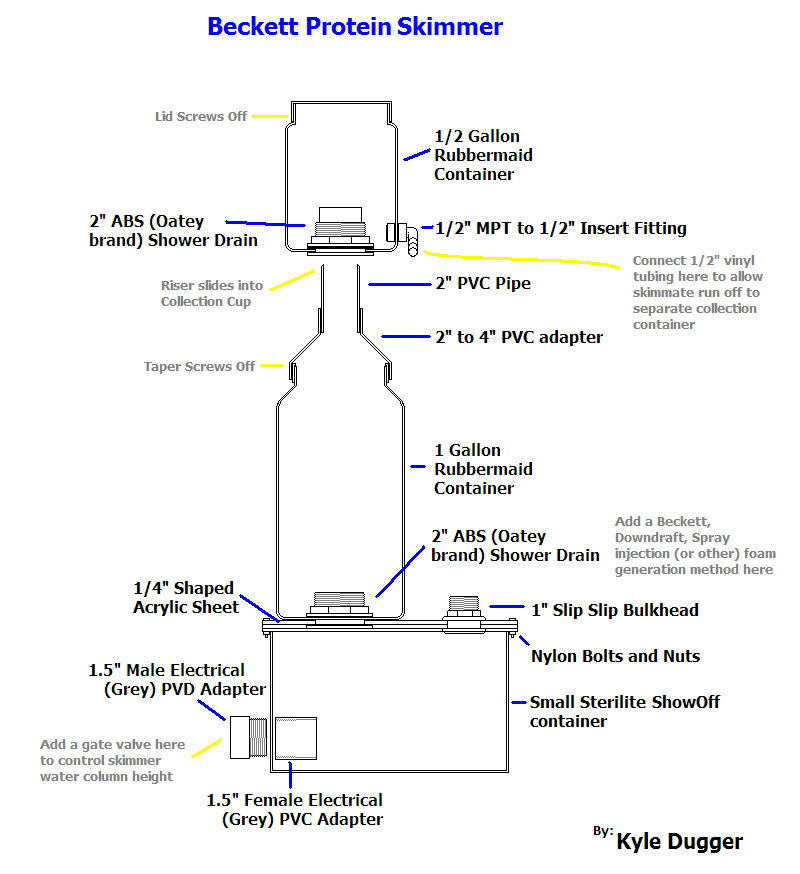
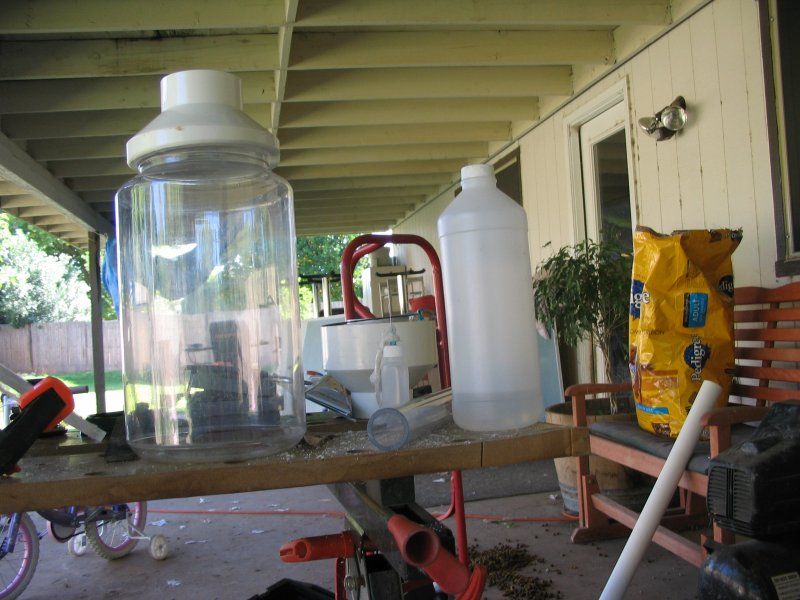
So here’s one saturday, and the resulting in sump beckett style protein skimmer.
Here’s what its looks like when its done
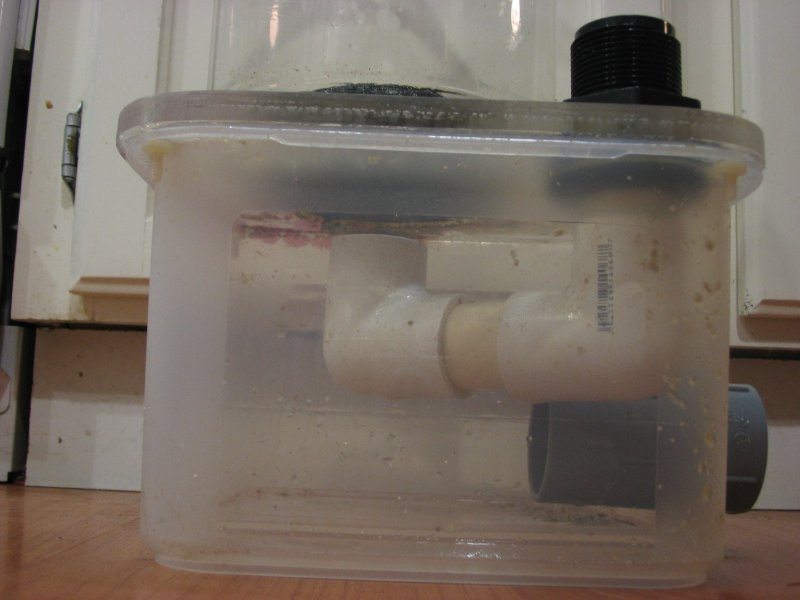
Skimmer Box
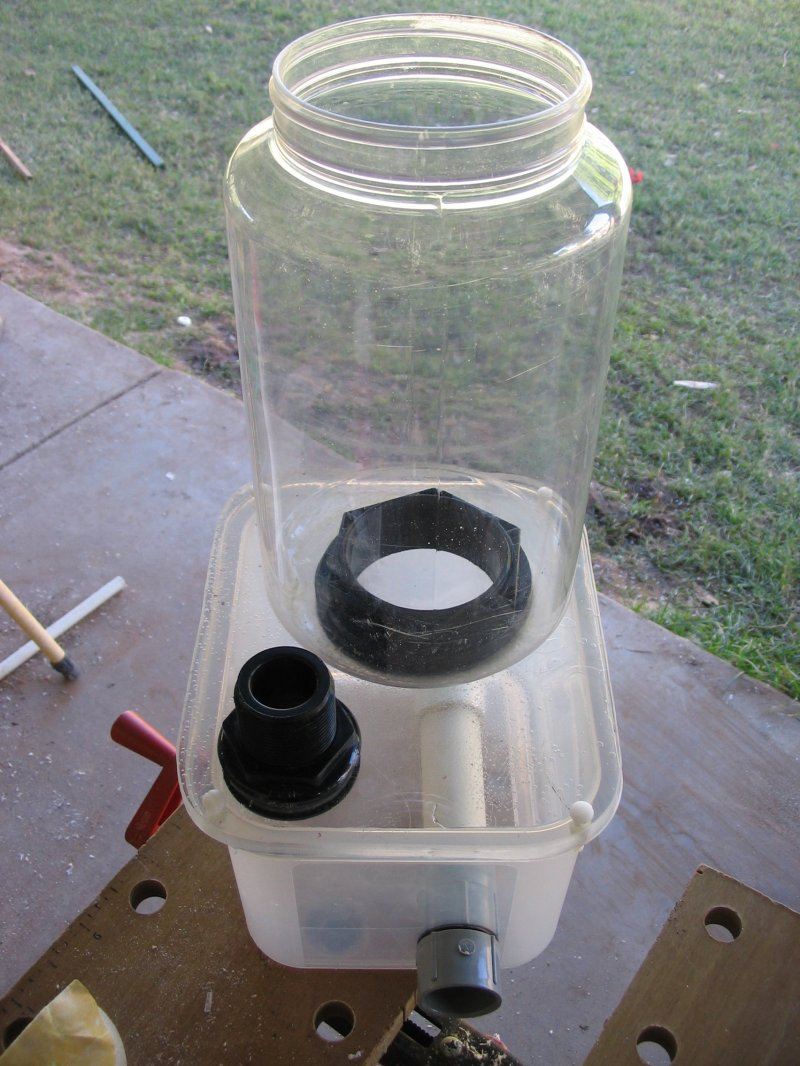
This is the Sterite brand “Show off” container. I just drilled a hole through the side and added the drain. The connection here is the two elec. PVC fittings screwed together. Although Ihave one, you don’t really need an o-ring on this fitting for water tightness, since a tiny leak here won’t kill you. Remember this is an in sump skimmer.
Skimmer Box Lid
Next we have to make the box lid. Here’s what it will look like when we are done.
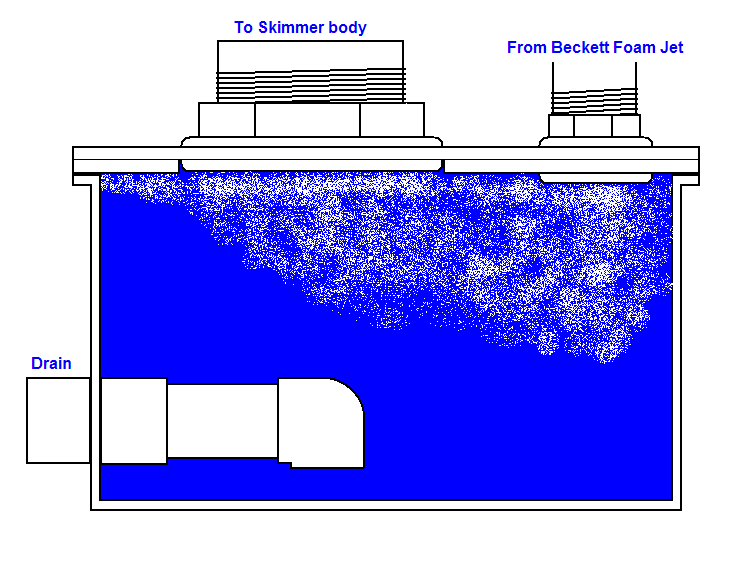
This part is definately the hardest part to do. Since the connection between the box lid and the skimmer body is made with a bulkhead, the bubbles in the box near the lid will build up into a large bubble just under the lid.

This little lip will create an air pocket. This pocket will continue to accumulate more bubbles and increase in size until the skimmer burps allowing a large bubble up through the skimmer body. As the large bubble makes it’s way up to to top it will disrupt the foam head and hamper skimmer effectiveness. So yes it’s undesireable and has to go.
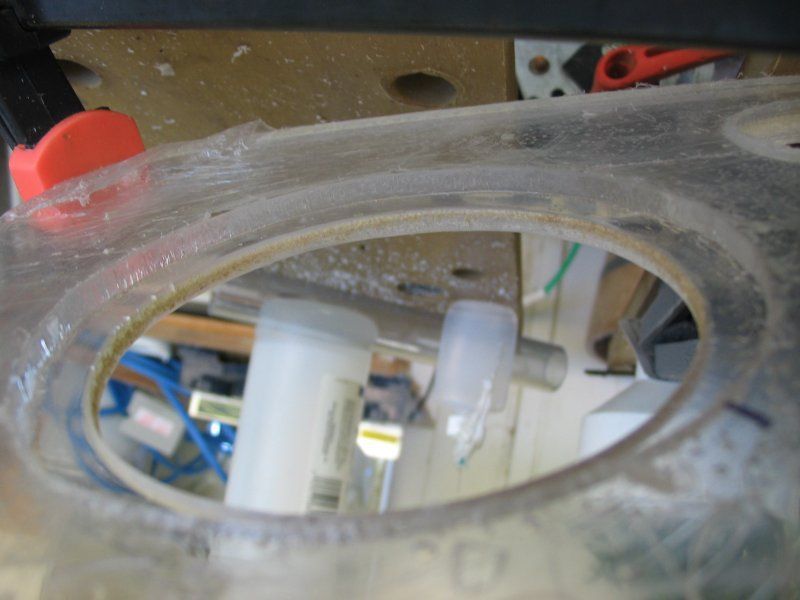
So to correct this we need the lip of the bulkhead to be countersunk into the lid bottom. Like this:
I used two sheets of 1/4″ acrylic to make the lid that would allow the bulkhead lip to countersink like this.
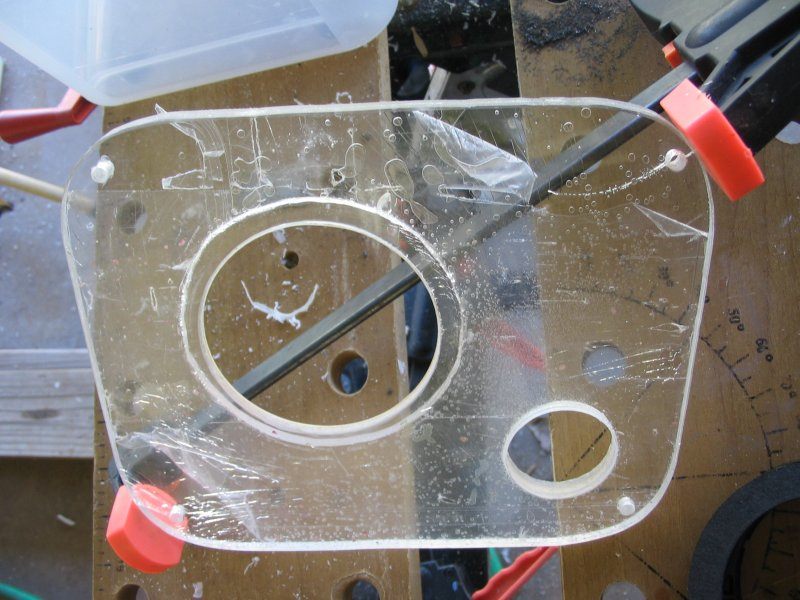
I cut two concentric circles of different sizes in the two identical sheets of acrylic. One hole was 3.5″. The other 5″. After cutting I bonded the two sheets together using Weld-on 4. Finally I drilled a single hole through both sheets for the foam jet inlet bulkhead.
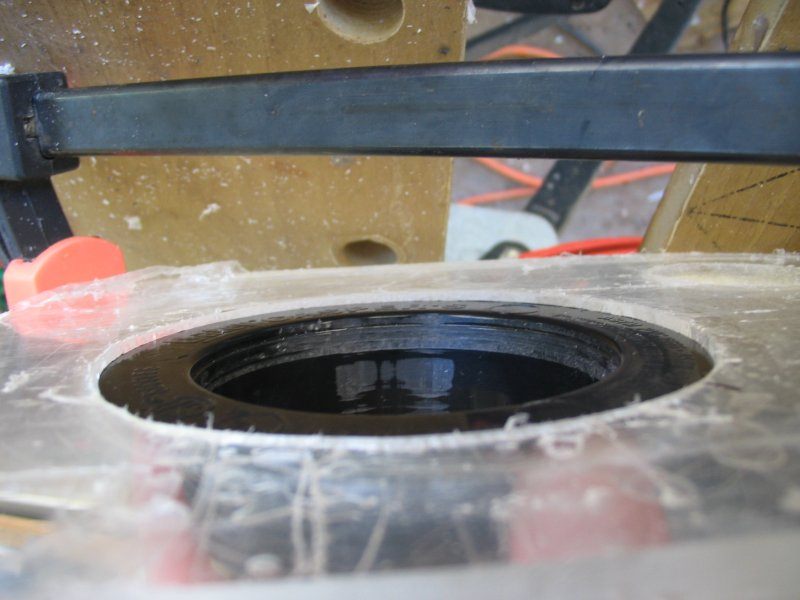
So here is the countersink hole.
So here is the hole with the bulkhead mounted. Notice how the bulkhead lip is sunken.
Note: I wish I could figure out a better easier way of solving this. One of my original goals was to remove any acrylic work from the skimmer. I haven’t yet been successful. If you have another good idea about this email me and I might include it or link to your idea.
For the bulkheads between the skimmer box and the body and between the skimmer body and collection cup, I used Oatey brand 2″ ABS drainfitting. The beauty of this fitting is it interfaces with 2″ schedule 40 PVC and it’s cheap compared to buying a 2″ bulkhead.
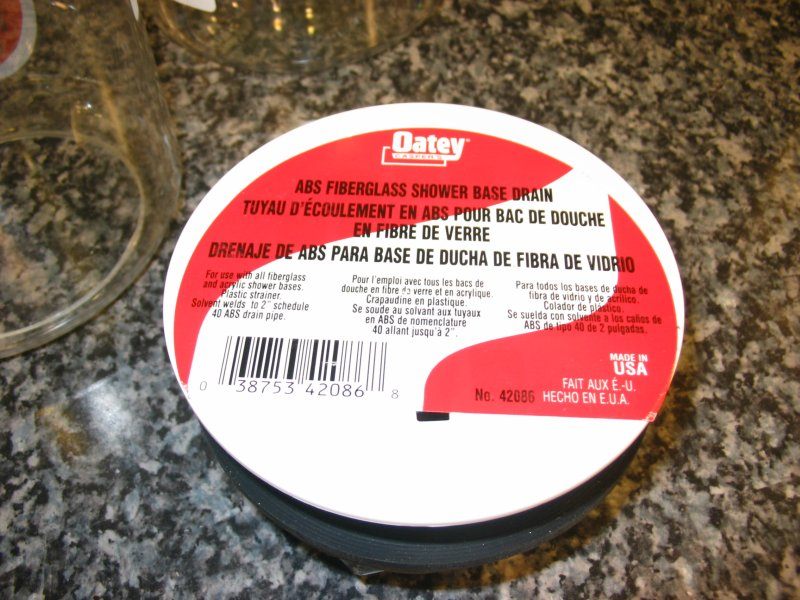
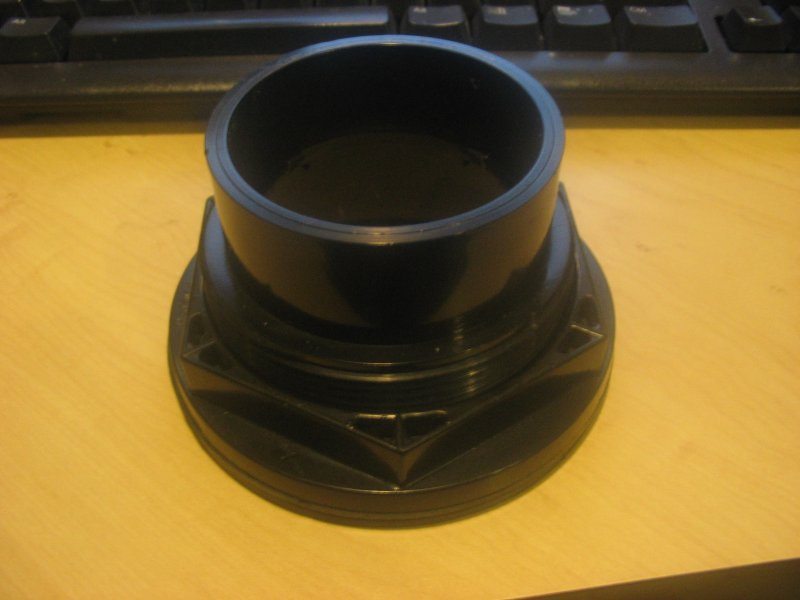
I cut the bulkhead to reduce its taper and length. See diagram. This is optional.
Skimmer Body
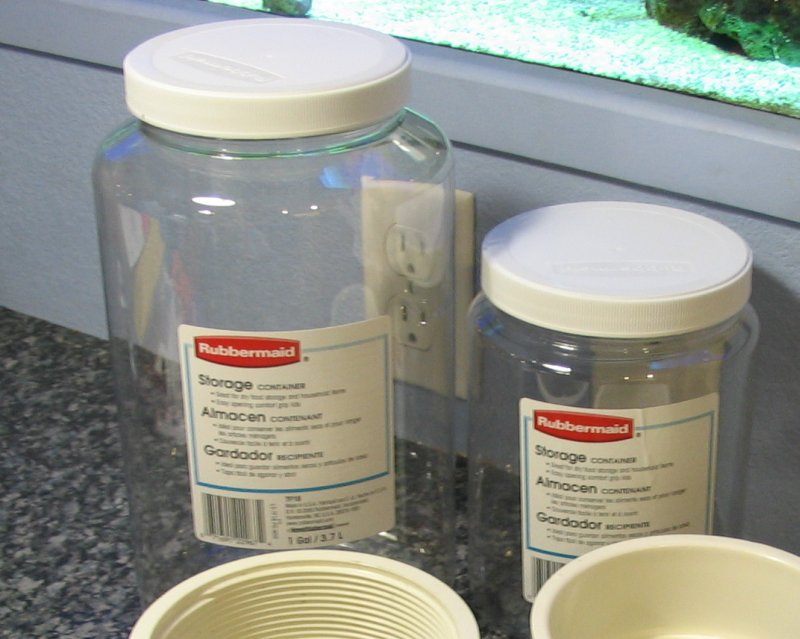
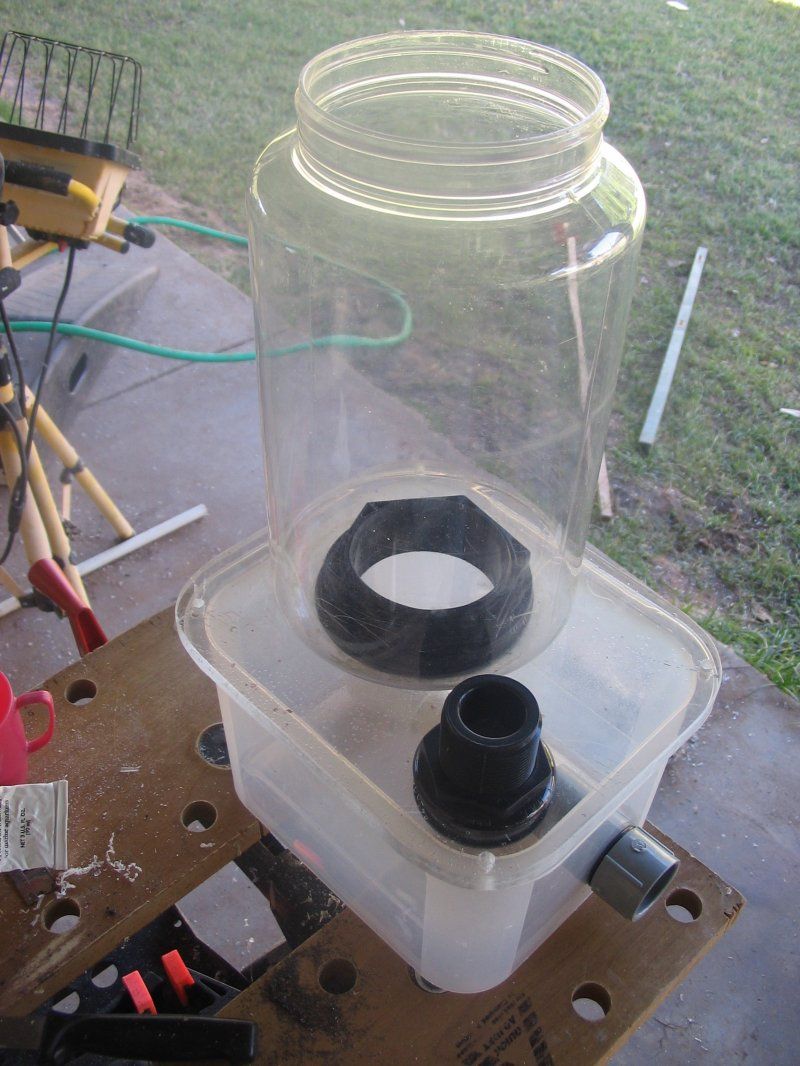
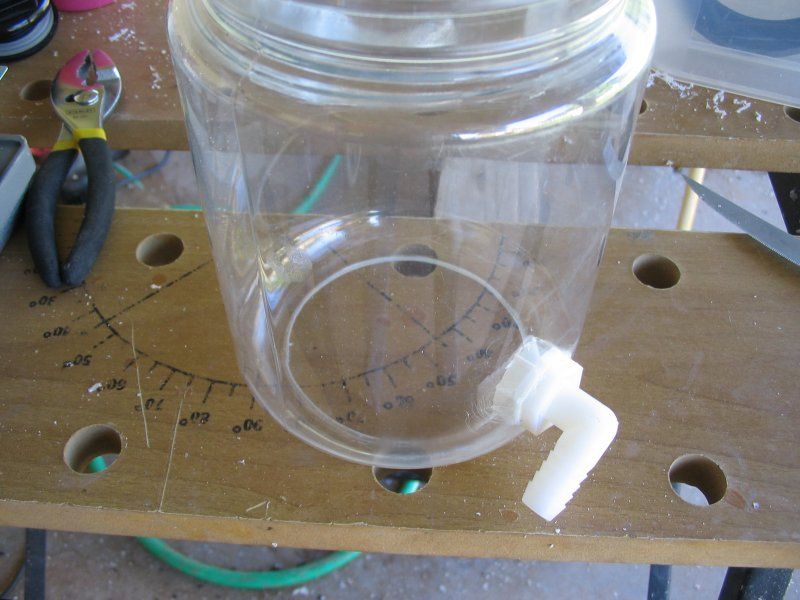
The skimmer body is created by cutting a 3.5″ hole into the bottom of a Gallon Rubbermaid(TM) food container and connecting it to the skimmer lid with the bulkhead.
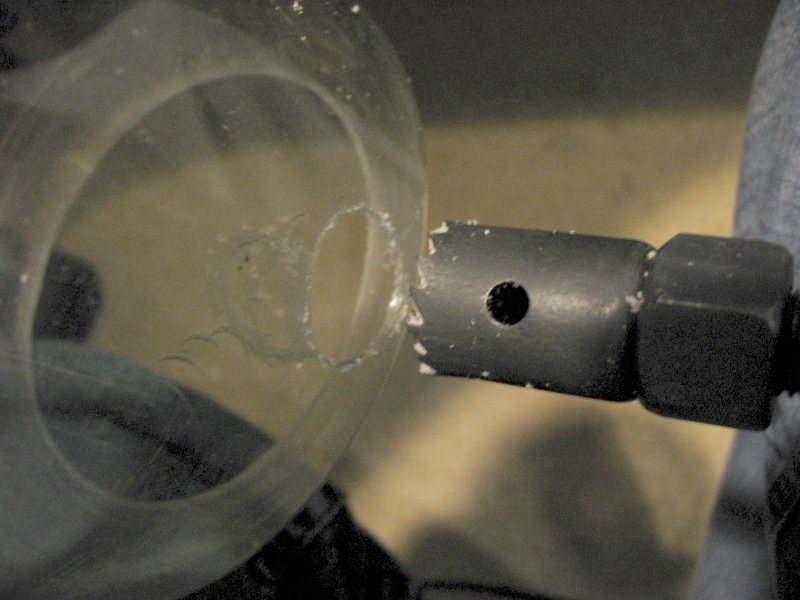
First drill a tiny hole (1/8″) in the center bottom of the food container. Using this as pilot hole cut the 3.5″ hole in the bottom using a hole saw.
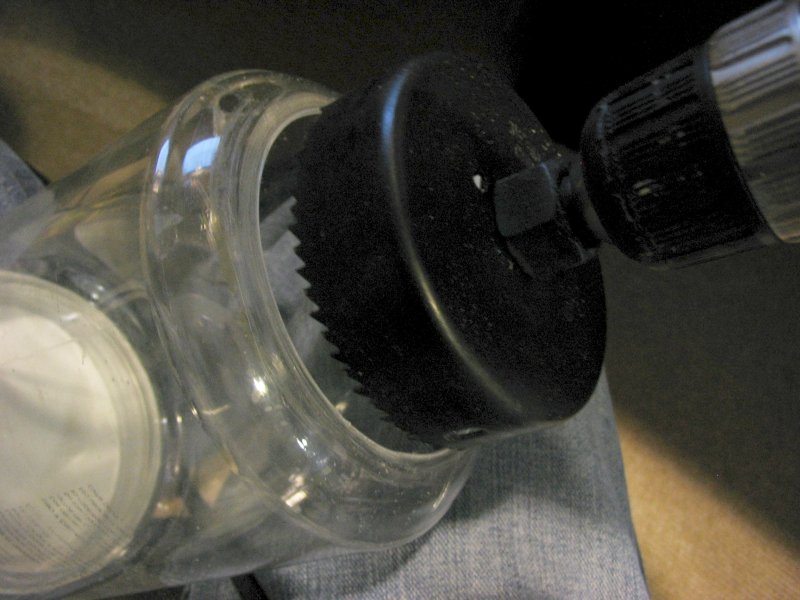
This is actually an image of the skimmer cup(2 quart food container). I don’t have one of the 1 gallon food container but the process is the same. Since you likely have everyting out, you might as well cut both holes at the same time – one in each container.
Once the hole is cut sand any burrs off the rim of the hole. Then attach the body to the lid using the bulkhead. I put a bead of silicone around the gasket and around the seam between the body and the lid to help control leaks there. Again, this is not really critical since where making an in sump skimmer.

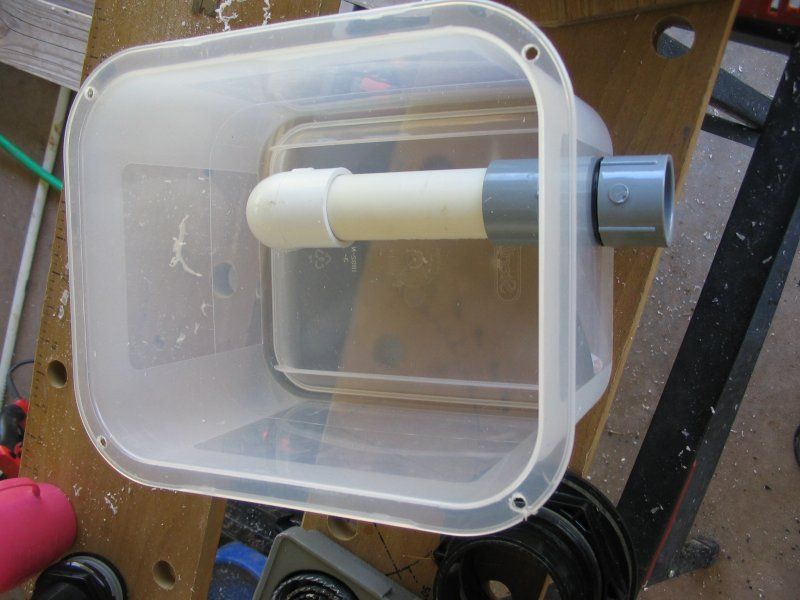
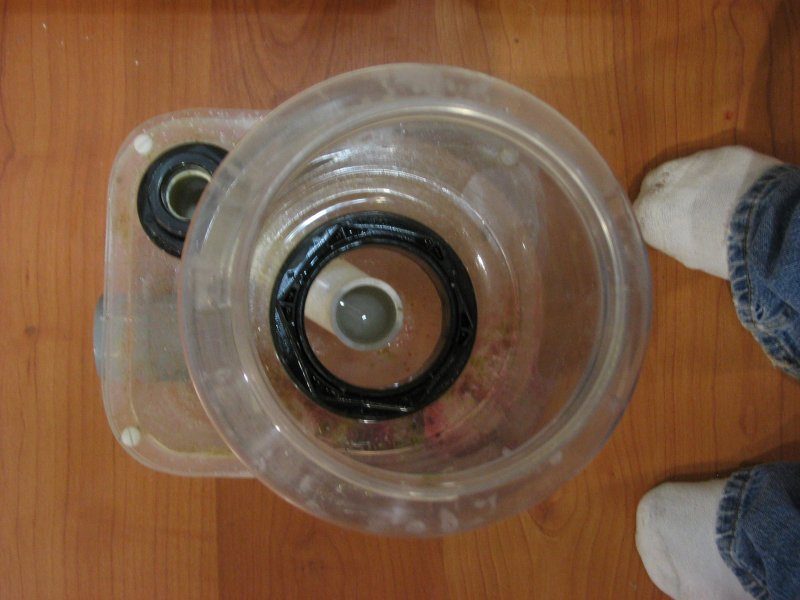
Here is a detailed shot of the bulkhead connecting the lid and the skimmer.
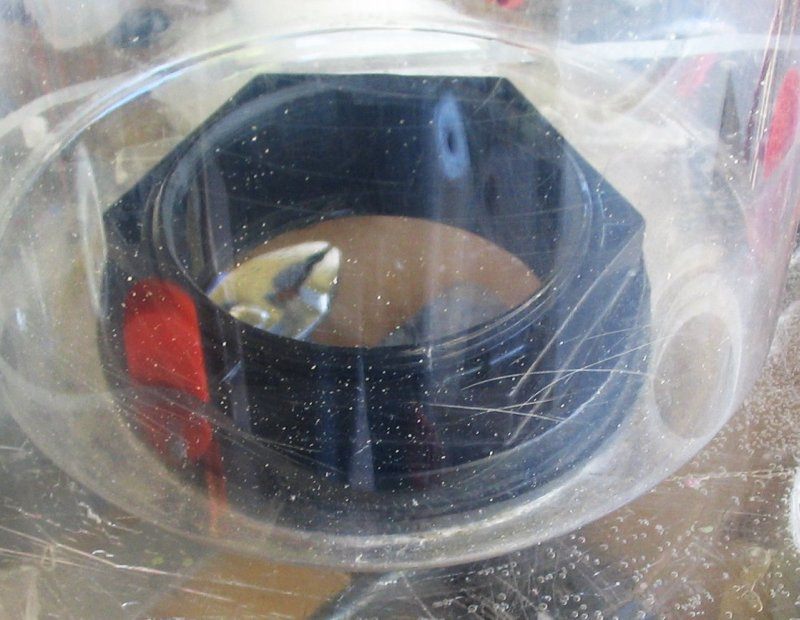
Since we won’t have access once we put the lid on the box, install the foam jet bulkhead at this time as well. (Yes, I actually am using something for what it was made for!
Attach Skimmer Lid to Box
To attach the lid to the box, drill some holes through the acrylic through the lip of the Skimmer box. Drill about 4-6 holes and install the nylon bolts and nuts. I added some silicone to help make a gasket seal between the box and the acrylic lid.
Done
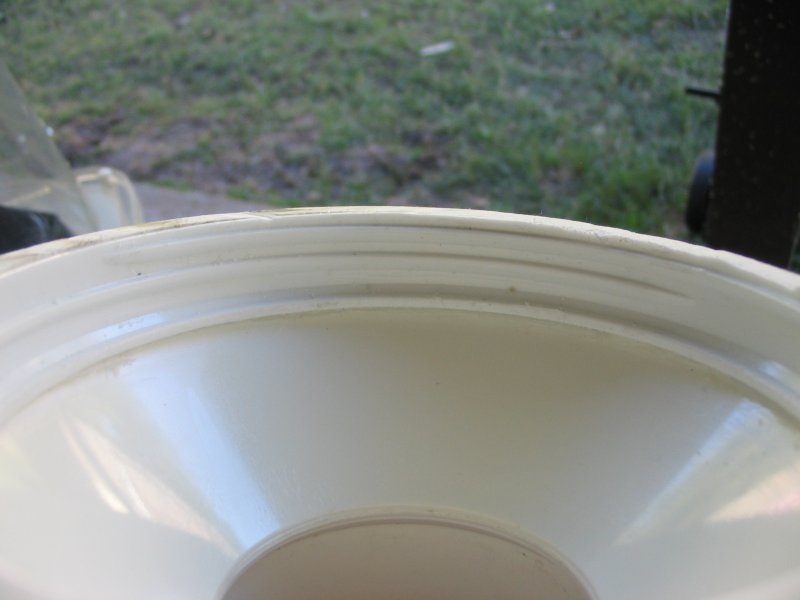
Skimmer Body Taper and Collection Cup
A Skimmer with a taper has a foam head with an advantage. The taper drives the foam head up and to the center gradually mantaining a better foam head that produces better dry foam (in theory at least).
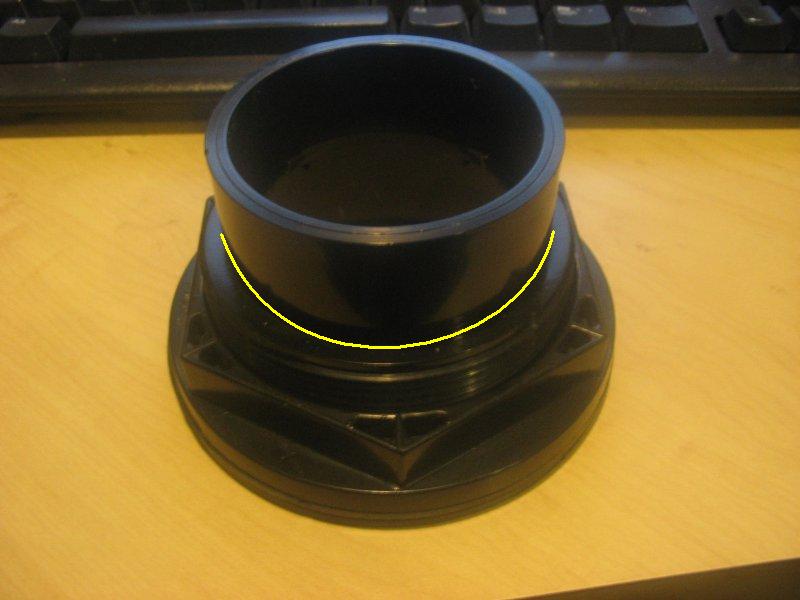
I use the 4″ to 2″ PVC adapter to create this foam head taper. There was a very nice serendipidous coincidence that the food container lids outer diameter was the exact same as the inner diameter of the fitting. This means it slides in and fits snug. I used this to allow me to attach the taper to the skimmer body by using the treads from the lid.
I cut a 4″ hole in the food container lid. This one is important to be precise. When you are done, there will a large hole in the lid. The remaining top of the lid is so small it’s almost unrecognizable. It’s just enough that when the food container is screwed into place that the top rim of the food container still has a small ledge to “seal” against on the lid. I don’t have images of this process, but the hole cutting is the same as the food container bottom only a different size bit (4″).
I cut the 4″ side of the adapter down to just seat the threads. This allows transparent area to see before the foam head starts. You could skip cutting down this adapter if you want. It will make the skimmer an inch or so taller.
Here’s a more detailed shot of that the lid inside the adapter. In roughed up the inside surface of the PVC adapter with sand paper and glued the lid in with silicone.
Now you can disassemble the skimmer cup by just unscrewing the lid. You need almost zero clearance for skimmer cup removal. Just enough to screw it off. This is also a really nice easy boundary. The lower portion of of the skimmer stays relatively clean while the taper and above accumulates skimmate layering. Just take off the top and clean it out.
Collection Cup
The collection cup is made from a 2 Quart Rubbermaid(TM) food container. I assume you have already drilled the 3.5″ hole in the bottom of this container in a prevous step. If you want a skimmer cup drainline it’s cheap and easy to add.
Drill a 3/4 hole in the side of the collection cup as low as possible so that the bulkhead will still install. (look ahead at the pictures).

Now to make the Collection cup bulkhead. Cut the threads of the 1/2″ MPT to 1/2″ Insert fitting. This will allow the clearance bulkhead to be tightened down. You’ll see why later. Cut the cap down as well.
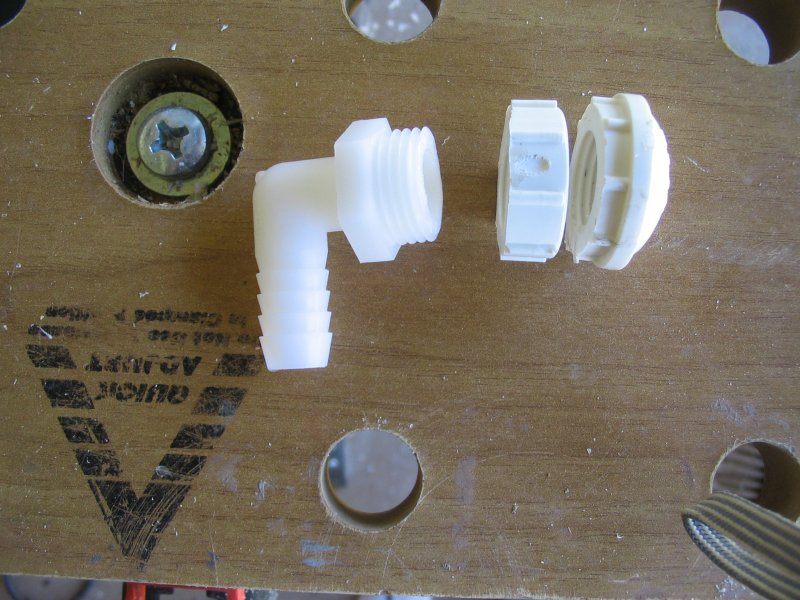
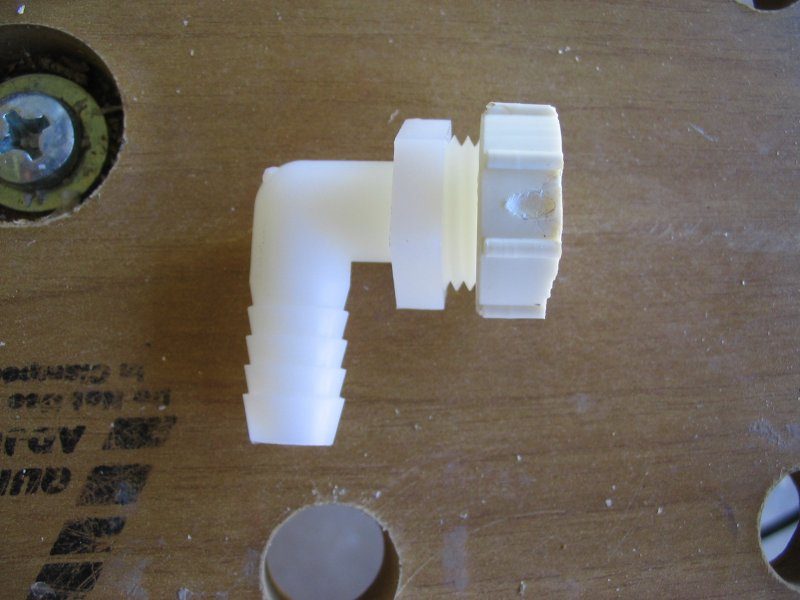
Attach the bulkhead adding a liberal amount of silicone on the threads. Tighten down until the bulkhead won’t rotate. This will help maintain the seal if the joint doesn’t get moved around.
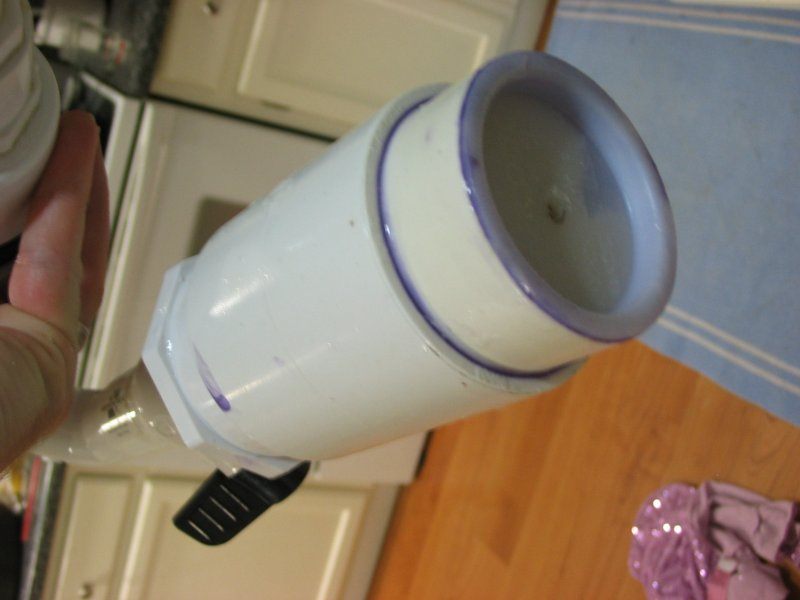
Collection Cup Taper Connection
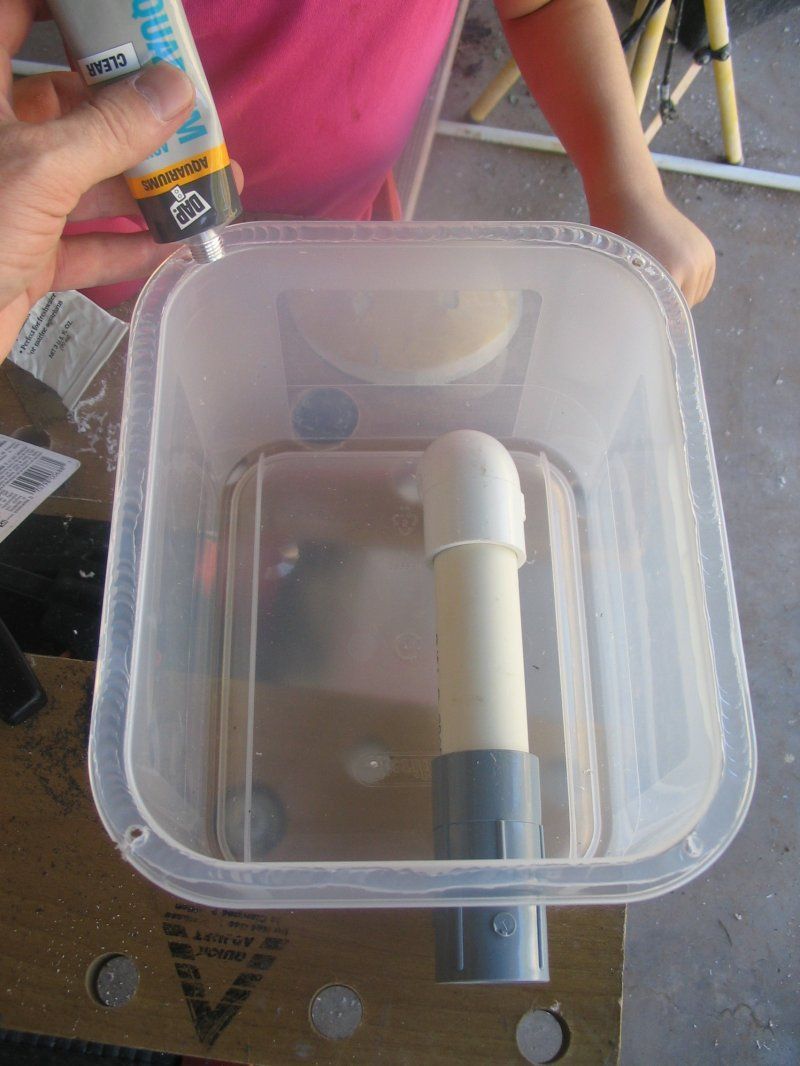
The last thing to make is the 2″ PVC riser tube and form the bulkhead to allow it to slide through. I filed down the tabs and taper on the inside of the bulkhead to allow the 2″ PVC pipe to very snuggly slide up and down the riser.
In this design, the riser tube is not adjustable. The collection cup can raise or lower on this riser tube but the height of the tube is constant. The height of the water column is controlled instead using the gate valve on the outlet drain. The collection cup could be permanently attached to the riser tube. I didn’t glue mine. I don’t think I glued the riser tub into the taper fitting either. I really don’t glue anything I don’t have to.
I did file the riser tube walls to a sharp point to allow the foam head to slide down to the bottom of the skimmer cup. Or better said to limit it’s ability to column upward to the collection cup lid.
So now screw on the taper cone and you’re ready to hook up the drain line and the some sort of foam injection. If I have time later I will show my beckett housing. It’s nothing special but works. For now I will make you search for another beckett housing design.
Unique take on saving money on the pump you chose for your beckett.

Notes
To be supplemented as I get feedback:
Update
I made a two changes to the skimmer after the build one was mentioned: The upsizeing of the outlet bulkhead from 1″ to 1.5″. The second is the addition of a bubble path tube from the foam jet inlet to the base of the skimmer body.
Here’s the tube to direct the bubbles to the center under the skimmer body. You can also see the bigger drain line.
Here’s my becket housing. The valve is for the air inlet the large bell on the other side of the valve is the muffler. Boy does it work well. I can’t hear the skimmer anymore, just the hum from the pump.