Reef
Blog
How to fix a crack in a fish tank


Fish tanks are a beautiful addition to any home or office, providing a tranquil and relaxing environment. However, accidents happen, and cracks can occur in fish tanks. A cracked fish tank can be a cause for concern as it can lead to leaks, compromising the health of your fish and damaging your furniture or flooring. But don’t worry! In this article, we will guide you through the steps to fix a crack in your fish tank and get it back to its pristine condition.
Step 1: Assess the damage
Before attempting to fix a crack in your fish tank, it’s crucial to assess the extent of the damage. Is the crack small or large? Is it a surface crack or does it go all the way through the glass? This initial evaluation will help you determine the appropriate course of action and the necessary materials for the repair.
Remember, some cracks may require professional assistance or even necessitate replacing the entire tank. If the crack is severe or you are unsure about your ability to fix it, it’s always best to consult a professional.
Step 2: Empty the tank
Before attempting any repair, it is essential to empty the fish tank. This will ensure the safety of your fish and make the repair process easier. Carefully transfer your fish to a temporary container with clean water that is similar to their current tank. It’s crucial to maintain the appropriate water temperature and conditions during this transition period to minimize stress on your fish.
Identifying the crack in your fish tank
When it comes to fixing a crack in your fish tank, the first step is to properly identify the crack. This will help you determine the severity of the crack and the necessary steps to fix it. Here are some key points to consider when identifying a crack:
Location
Take note of where the crack is located on your fish tank. Is it near the bottom, the sides, or the top? This will help you understand how the crack may have occurred and how it could potentially affect the overall stability of the tank.
Size
Determine the size of the crack. Is it a small hairline crack or a larger one that extends across the tank? Measure the length and width of the crack to get an accurate assessment, as this will play a role in deciding the appropriate repair method.
Depth
Examine the depth of the crack. Is it a surface crack, or does it penetrate through the glass panel? A deeper crack may pose a higher risk of leakage or structural damage to the tank.
Extent of damage
Inspect the surrounding area of the crack for any signs of additional damage. Are there any chips or fractures? Identifying the extent of damage will help determine if a simple repair will suffice or if a professional should be consulted.
Once you have identified the specifics of the crack in your fish tank, you can move on to finding the appropriate repair method and taking the necessary steps to fix it.
| Location | Size | Depth | Extent of Damage |
|---|---|---|---|
| Near the bottom | Small hairline crack | Surface crack | No additional damage |
Determining the severity of the crack
Before attempting to fix a crack in a fish tank, it is important to assess the severity of the damage. This will help you determine the best course of action to take. Here are some factors to consider when evaluating the severity of the crack:
-
Size of the crack:
Take a close look at the crack and note its size. Small cracks may be manageable and can be repaired easily, while larger cracks may require professional assistance or even a replacement tank.
-
Location of the crack:
Where the crack is located on the fish tank can affect its severity. If the crack is near the bottom or edges of the tank, it may be more significant, as these areas experience greater pressure and stress.
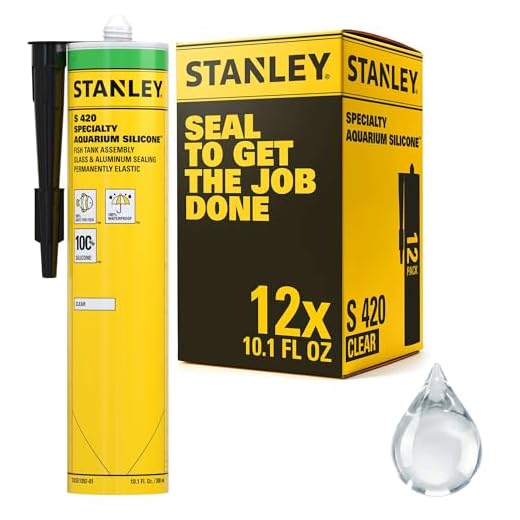
Must-Have Stanley Waterproof Aquarium SiliconeNon-Toxic and Solventless SealantEngineered with 100% solventless silicone, this sealant ensures a reliable bond that's safe for aquatic life. Its quick curing feature allows for immediate use, suitable for both freshwater and saltwater environments. -
Depth of the crack:
Consider how deep the crack is. Shallow surface cracks may be purely cosmetic and not pose a significant threat to the integrity of the tank, while deeper cracks can compromise the tank’s structural integrity.
-
Behavior of the crack:
Observe the crack closely to see if it is stable or spreading. If the crack is growing or getting longer, it may require immediate attention to prevent further damage or complete failure of the tank.
By assessing these factors, you can better understand the severity of the crack in your fish tank and decide on the appropriate course of action to take to fix it.
Gathering the necessary materials
Before you can start fixing the crack in your fish tank, you will need to gather a few materials. Here is a list of what you will need:
Glass adhesive
You will need a good quality glass adhesive that is specifically designed to bond glass surfaces. Look for a product that is labeled as aquarium-safe to ensure it won’t be harmful to your fish.
Razor blade or glass cutter
To prepare the cracked area for repair, you will need a razor blade or glass cutter. This will help you remove any loose or damaged glass around the crack so that the adhesive can bond properly.
Lint-free cloth or paper towels
It’s important to have a lint-free cloth or paper towels on hand to clean the cracked area and remove any debris or dirt. This will ensure a clean surface for the adhesive to adhere to.
Protective gloves
Wearing protective gloves is recommended when working with adhesives to protect your hands from any harmful chemicals or sharp glass edges.
Masking tape
Masking tape will be used to hold the crack together while the adhesive dries. Make sure to use a tape that won’t leave a sticky residue on your fish tank.
Once you have gathered all of these materials, you will be ready to proceed with the repair process.
Draining the water from the fish tank
When dealing with a crack in your fish tank, the first step is to drain the water from the tank. It is essential to remove the water before attempting any repairs to ensure the safety of the fish and the stability of the tank.
Gather the necessary materials
To drain the water effectively, you will need a few tools:
- A clean bucket or container large enough to hold the water from the tank
- A siphon or a gravel vacuum
- A clean, soft cloth to wipe the tank dry
Steps to drain the water
- Turn off and unplug any equipment connected to the tank, such as filters or heaters. This will prevent any accidents and protect the equipment from damage.
- Place the bucket or container near the tank, ensuring that it is clean and free from any contaminants.
- Insert one end of the siphon or gravel vacuum into the tank, making sure it reaches the bottom.
- If using a siphon, manually initiate the siphoning process by sucking on the other end until the water starts flowing. If using a gravel vacuum, follow the manufacturer’s instructions to start the vacuum.
- Direct the other end of the siphon or gravel vacuum into the bucket or container, allowing the water to flow out of the tank.
- Continue draining the water until the tank is empty or until you have removed the necessary amount of water for the repairs.
- After draining the water, use a clean, soft cloth to wipe the interior of the tank dry. Ensure that the area around the crack is free from any moisture.
By following these steps, you can safely and effectively drain the water from your fish tank, preparing it for the repair process.
Applying the appropriate sealant
Once you have identified and prepared the cracked area of your fish tank, it is time to apply the appropriate sealant. There are several options available, but the most common and effective one is aquarium silicone sealant.
1. Choose a high-quality sealant: Look for a sealant specifically designed for aquarium use. It should be non-toxic and safe for fish and other aquatic life.
2. Clean the cracked area: Use a clean cloth or sponge to remove any dirt, debris, or algae from the cracked area. Ensure that the surface is dry before proceeding.
3. Apply the sealant: Squeeze a small amount of sealant onto your finger or a silicone application tool. Carefully apply a thin layer of the sealant along the crack, making sure to cover the entire length of the crack.
4. Smooth the sealant: Use a finger or a silicone application tool to smooth out the applied sealant. This will help create a neat and even seal.
5. Allow the sealant to cure: Follow the manufacturer’s instructions for the recommended curing time. Typically, aquarium silicone sealant takes about 24 hours to fully cure.
6. Test the seal: After the curing period, fill the tank with water and monitor it for any signs of leaking. If there are no leaks, you have successfully applied the sealant.
Note: It is important to let the sealant cure completely before reintroducing fish or any other aquatic life into the tank. This will ensure that the sealant has fully bonded and is safe for the inhabitants of the aquarium.
Allowing the sealant to dry
Once you have applied the sealant to the crack in your fish tank, it is crucial to allow it to dry completely before refilling the tank with water. The drying process can take anywhere from 24 to 48 hours, so be patient and avoid rushing the process.
During this time, it’s important to ensure that the tank is kept in a safe and dry environment, away from any potential disturbances or accidents. This will allow the sealant to set properly and create a strong bond to repair the crack effectively.
Tip: Make sure to follow the specific instructions provided by the manufacturer of the sealant you are using. Different sealants may require different drying times or application methods, so be sure to read and follow the guidelines carefully.
While waiting for the sealant to dry, it’s a good idea to keep a close eye on the repaired area. If you notice any signs of leaking or further damage, it may be necessary to apply additional layers of sealant to reinforce the repair.
Remember to prioritize the safety of your fish during this process. If necessary, temporarily transfer them to a suitable temporary tank or container to ensure they remain healthy and secure while the repairs are happening.
Question & Answer
What should I do if I notice a crack in my fish tank?
If you notice a crack in your fish tank, the first thing you should do is remove any fish or plants from the tank and transfer them to a temporary holding tank. This will ensure their safety while you fix the crack in the main tank.
Can I use tape to fix a crack in my fish tank?
No, using tape is not a recommended solution for fixing a crack in a fish tank. It may provide a temporary fix, but it is not a permanent solution. It is best to properly repair or replace the tank to ensure the safety of your fish.
How can I fix a small crack in my fish tank?
If the crack in your fish tank is small, you can try using an aquarium sealant to seal the crack. Start by draining the tank and drying the affected area. Apply the sealant to the crack, making sure to cover it completely. Allow the sealant to cure according to the manufacturer’s instructions before refilling the tank.
What should I do if the crack in my fish tank is large?
If the crack in your fish tank is large, it may be best to replace the tank altogether. Large cracks can weaken the structural integrity of the tank, and attempting to repair them may not provide a long-term solution. Consult a professional or consider purchasing a new fish tank to ensure the safety of your fish.
Can I prevent cracks from forming in my fish tank?
While it is impossible to completely prevent cracks from forming in a fish tank, there are steps you can take to reduce the risk. Avoid placing heavy objects on the tank, be mindful of temperature changes to prevent thermal stress, and regularly inspect the tank for any signs of damage. Taking these precautions can help minimize the chances of cracks forming in your fish tank.
What should I do if I notice a crack in my fish tank?
If you notice a crack in your fish tank, it is important to take immediate action to prevent any further damage. The first step is to relocate your fish to a temporary tank or container to ensure their safety. Next, carefully drain the water from the cracked tank and remove any decorations or items inside. Once the tank is empty, you can assess the severity of the crack and decide whether it can be repaired or if you will need to replace the tank altogether.
Can I fix a crack in my fish tank myself?
Yes, it is possible to fix a crack in a fish tank yourself, depending on the size and location of the crack. There are a few methods you can try, such as using silicone sealant or glass adhesive to seal the crack. Before attempting any repairs, make sure to clean the area around the crack thoroughly and dry it completely. Apply the sealant or adhesive according to the manufacturer’s instructions, and allow it to dry and cure before refilling the tank with water. Keep in mind that DIY repairs may not be as strong or long-lasting as professional repairs, so it is important to closely monitor the tank for any signs of further damage.